
The Eyeliner Struggle is Over: The Easiest Way to Fill Between Your Lashes
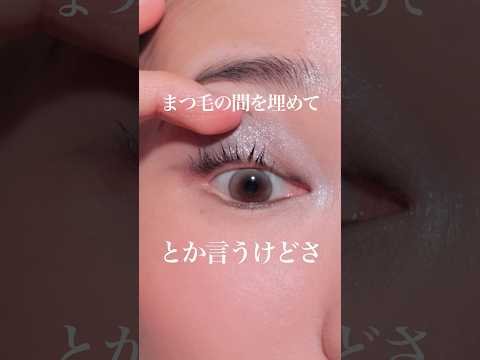
We have all heard the classic makeup advice: "Just fill in the gaps between your eyelashes to make them look thicker!" It sounds incredibly simple in theory, but in practice? It is usually a frustrating, messy process that leaves you poking your eye or ending up with a jagged, uneven line.
If you struggle to get that perfectly dark, dense lash line without the mess, it might be time to rethink your tools. Here is the professional breakdown of why your current eyeliner isn't working — and the foolproof method you should be using instead.
Why Your Regular Eyeliners Are Failing You
When trying to tightline or fill the lash roots, most of us reach for one of two things, but both have major drawbacks:
- Pencil eyeliners: while pencils are fantastic and highly recommended for coloring in the actual waterline (the inner rim of the eye), they are surprisingly difficult to wiggle into the tiny spaces between the lash roots without making a smudgy mess.
- Liquid eyeliners: is it possible? Yes. Is it infuriating? Also yes. Using a liquid pen to dot between lashes is incredibly tedious, detailed work. Plus, trying to connect those dots into a perfectly straight, even line along the lid is notoriously difficult.
The Pro Secret: Gel Eyeliner & A Flat Brush
It might seem like adding a separate brush to your routine is more work, but using a pot of gel eyeliner and a flat, angled brush is actually the fastest, cleanest, and most foolproof method for filling out your lash line.
Here is the game-changing technique:
1. Stamp, Don't Draw
Coat your flat brush in the gel liner and pinch it so the bristles are perfectly flat. Use your free hand to gently lift your eyelid upward, exposing the roots of your lashes. Instead of trying to "draw" or drag a line across, simply press and stamp the flat edge of the brush directly into the roots of the lashes.
2. Wing It Out
Because the brush already has a straight, angled edge, you can use whatever product is left on the brush to effortlessly stamp out a clean, sharp wing at the outer corner of your eye.
3. Soften the Edges
For a truly professional, integrated look, take a little bit of dark eyeshadow on a small brush and gently smudge over the liner you just laid down. This softens the edges and makes the liner look like a natural shadow of your lashes.
Why This Works
Gel eyeliners are designed to set down and lock into place. Once that gel dries, it provides an intense, smudge-proof color that won't run down your face. By stamping the product rather than dragging it, you get maximum density right at the root, making your lashes look unbelievably thick with zero frustration!
Are you team liquid, pencil, or gel eyeliner? Let us know in the comments!
Products Used - Gel eyeliner (pot) — sets and locks in for smudge-proof density at the root - Flat angled eyeliner brush — the key tool for the stamp-and-wing technique - Dark eyeshadow — smudged over the liner to soften the edges